



Grade 7 · CAPS TechnologyLaser-cut in Gauteng
Jaws of Life School Project Kit – Grade 7
R 279.00
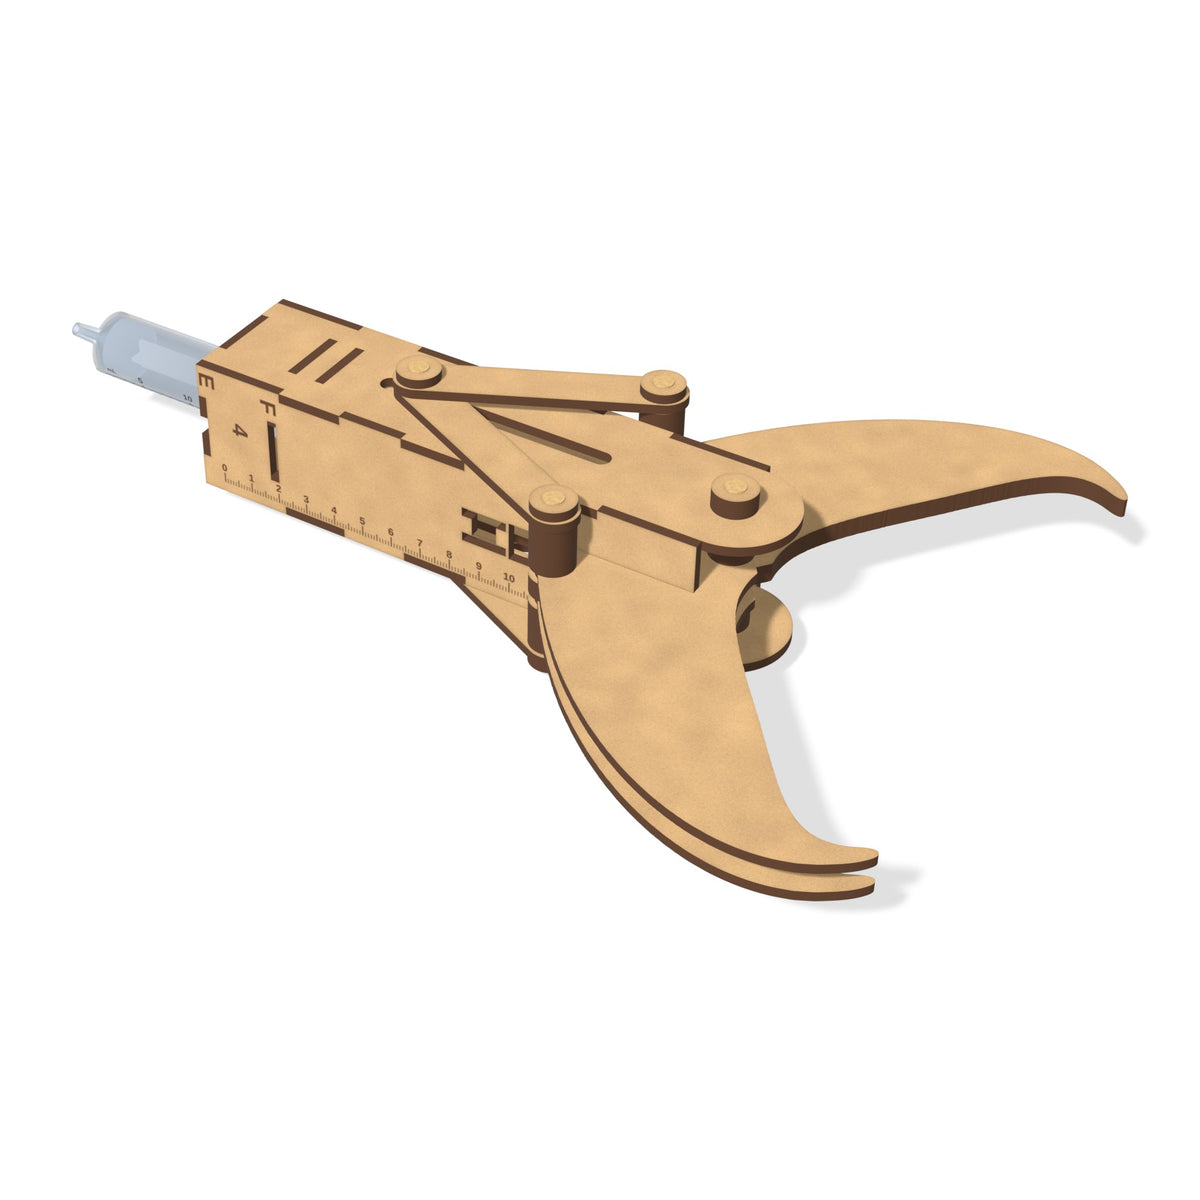
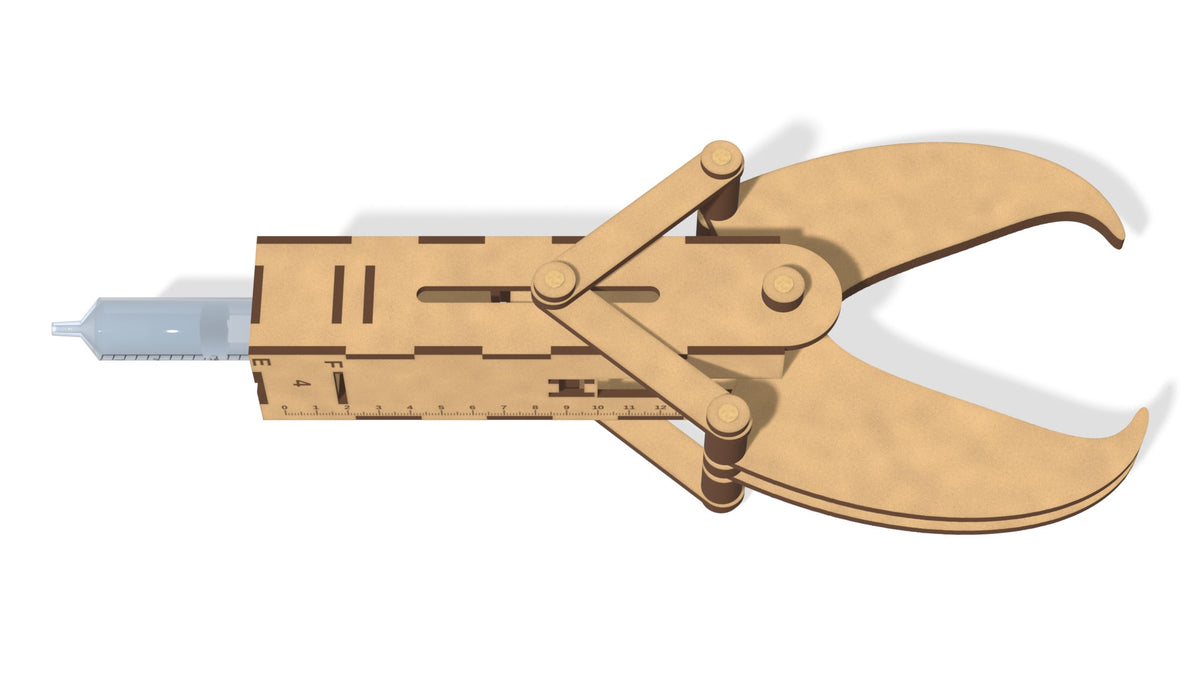
A laser-cut wooden kit for the Grade 7 jaws of life school project: a working model of a hydraulic rescue tool that runs on water in two 20 ml syringes. Push the master syringe and the jaws bite shut; pull it back and they open wide. No batteries and no motor, and it builds as a cutter and as a spreader, the two tools real rescue teams use.
What's in the box: all the jaws of life project materials
82 laser-cut pieces and 4 bamboo dowels, packed flat:
- 3 mm MDF sheets × 4 (200 × 300 mm each), with every part labelled
- 20 ml syringes × 2 and a silicone tube
- Bamboo dowels × 4, for the jaw pivot, the crosshead and the two jaw pins
- Wood glue × 1 · sandpaper strip × 1
- A set of cutting jaws, a set of spreading jaws and four press-out tools, all cut into the sheets
Water for the syringes is not included: tap water is what it runs on.
How the hydraulics work
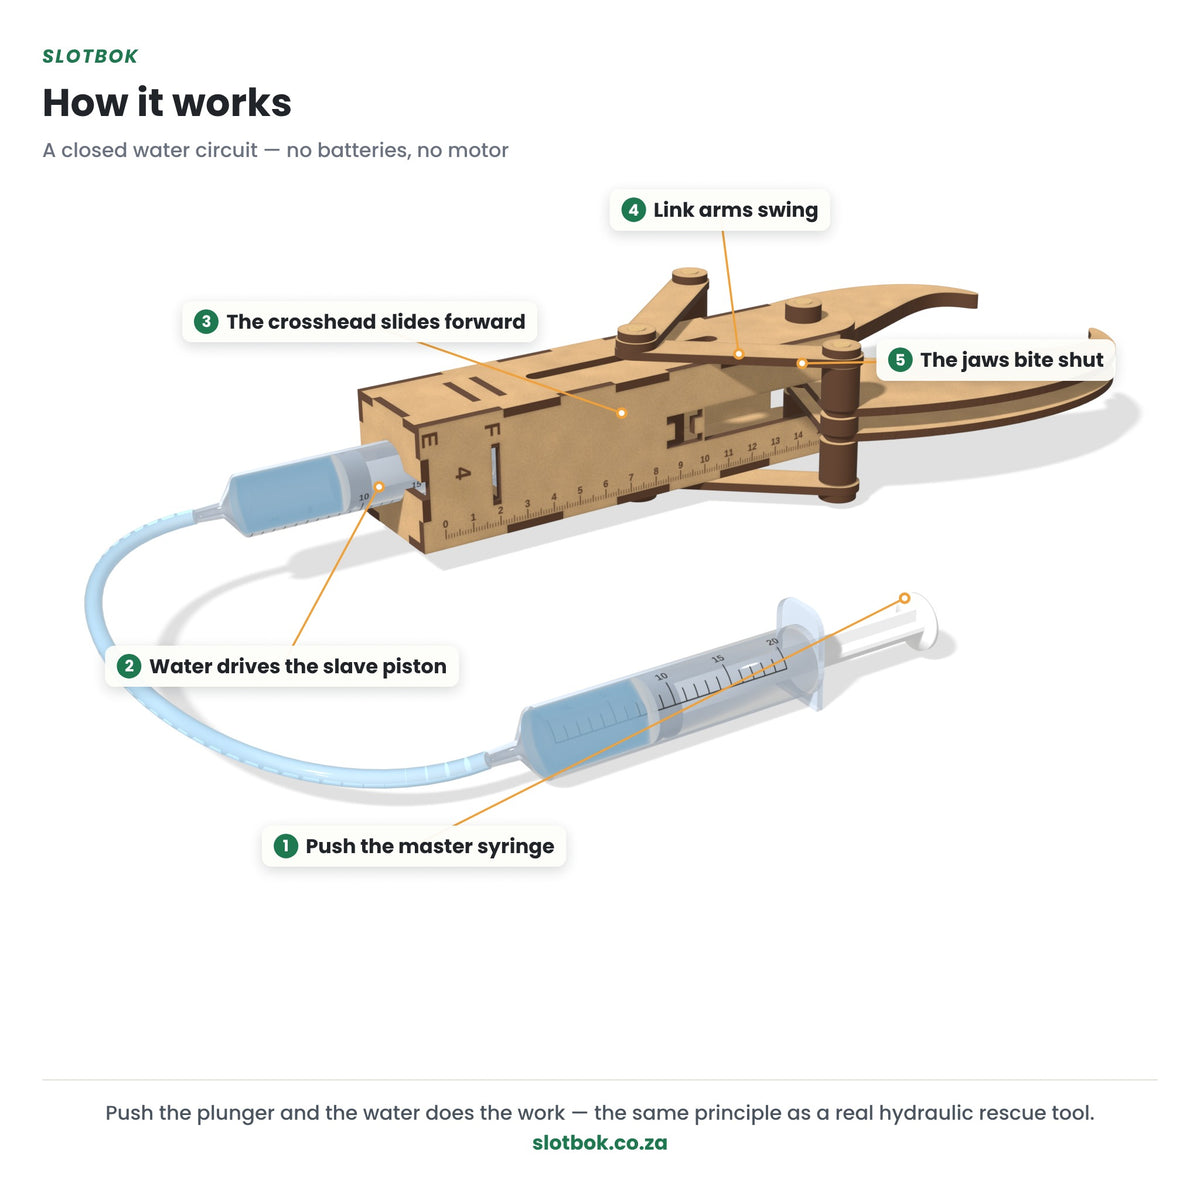
The two syringes and the tube make one closed water circuit. The master syringe stays in your hand. The slave syringe sits inside the body of the tool, with the crosshead clipped onto its plunger. Push the master plunger and the water has nowhere to go but down the tube, so it pushes the slave plunger out: the crosshead slides forward, the four link arms swing, and the jaws close. Pull the master back and it all runs the other way.
That is what a Grade 7 report on hydraulics has to explain: water does not squash, so a push at one end comes out at the other. A real jaws of life works the same way, with a pump and hydraulic oil at very high pressure instead of a syringe of water.
Cutter and spreader in one kit
The kit builds the cutter first. To turn it into a spreader, pull out the jaw pins and the link arms, fit the four spreading jaws, and rebuild the pins, spacers and links. Now a push on the plunger forces the jaws apart, the way rescuers force open a jammed car door.
How to make the jaws of life, step by step
Every kit comes with a short 3D animation of the whole build, so a learner can watch it once and get it right the first time. It takes the build in eleven steps:
- Glue the crosshead. Stack the 12 crosshead blocks with the T-slots lined up, gluing each layer.
- Base and first side. Lay out base plate 1 and slot side wall 2 into it.
- Syringe holders. Drop holder F into its slot, then holder G behind it.
- Syringe and crosshead. Slide nose piece E onto the slave syringe, clip the crosshead onto the plunger disc and lower the whole unit into the body.
- Second side. Slot side wall 3 onto the base tabs.
- Top cover. Press cover 4 down onto the tabs.
- Jaws on the pivot. With the body on its side, stack spacer washers, the four cutting jaws and more spacers, then push the pivot dowel through with a lock washer on each end.
- Link arms. Fit the four link arms, two per side, with the crosshead dowel through their ends.
- Jaw pins and spacers. Fit the upper and lower jaw pins with their spacer columns, and trim the dowels flush.
- Master syringe and tube. Push the tube onto both nozzles, fill the circuit with water and squeeze the air out.
- Spreading jaws. Swap the cutting jaws for the spreading jaws whenever you want the spreader.
Before step 1, press every part out of its sheet and sand the tabs lightly so they slide in rather than being forced. The full walk-through, with the science for the write-up, is here: how to make a jaws of life project, step by step.
The whole build is also on the jaws of life assembly video page.
Testing it
Push the master plunger and the cutting jaws close; pull it back and they open wide. If the jaws move late or feel spongy, there is air in the circuit: take the tube off, refill it with water and squeeze the bubbles out. An engraved centimetre ruler runs along the side of the body, handy for measuring how far the crosshead moves with each push.
Size when built
The assembled cutter is 345 mm long, 140 mm wide and 62 mm high, and its jaws open to 147 mm across.
Materials
Every wooden part is cut by laser from 3 mm MDF, so tabs and slots meet within a fraction of a millimetre. Each part is labelled. The wood glue is for the crosshead, which is built up in glued layers, and the sandpaper strip is for easing any tab that feels tight.
Test-fitted before it's packed
We build every kit once by hand before it is packed. If a part doesn't fit, that's on us, not on your learner.
Built for the CAPS Technology syllabus
Drawn in our own workshop and checked against the CAPS Technology syllabus for Grade 7, where hydraulics is part of Mechanical Systems and Control. See all Grade 7 Technology projects.
Common questions
Where can I buy a jaws of life school project kit? Right here. Order online and we deliver to homes, schools and shops across South Africa from our workshop in Gauteng.
Does it need batteries? No. It runs on tap water in the two syringes; there is no motor and nothing electrical.
What materials do I need for the jaws of life Grade 7 project? With this kit, only tap water. The 82 laser-cut MDF parts, both syringes, the tube, the dowels, the glue and the sandpaper are all in the box.
Is it the whole Grade 7 project? It is the model. The design brief, the drawings and the write-up are still the learner's own work, and the build guide explains the hydraulics in plain words to help with that.
Delivery
Packed in one flat box in Gauteng and shipped to homes, schools and shops across South Africa and Namibia. Standard delivery anywhere in South Africa is R65. Delivering to Namibia? WhatsApp us with your town for the cost. Buying for a class or a shop? Ask about class sets and wholesale.
- 01 Drawn
- 02 Cut
- 03 Test-fitted
- 04 Filmed
- 05 Packed
Other kitsProjects & puzzles
Build one this term.
Get a kit